(originally shared in 2016, I now do this every 4-6 weeks and absolutely love it every time!)
The topic of the safest way to cover grays or just change up your normal hair color comes up quite a bit! Henna & indigo are a great, safe, USDA certified organic option that are super affordable! It’s $10/pack via Poofy Organics (my affiliate link: https://ecofriendlyusa.poofyorganics.com/). So for $20 total I was able to do my hair 3 times! I had plenty extra each time so could’ve done 4 times had I not made too much, but it’s best to err on the side of caution when mixing the stuff up. Once you do it that 1st time, your confidence will be boosted & you’ll realize how easy it is & how great the results are!
What you need to know:
You can do just henna, but you’ll definitely end up on the red spectrum. How red depends on your current hair color & how long you leave it on. Don’t do just indigo, you’ll end up on the green spectrum. A combo of both henna/indigo will land you somewhere on the brown/black spectrum depending on where you’re starting from & how long you leave it on!
I’ve done this 3 times now. My hair was very, very short the 1st time, it’s now shoulder-length. It is very thick. For super short hair, you can get away with 1/4 a pack. Otherwise I’d go with 1/3 a pack for medium hair. For waist length hair, a 1/2 pack of each should still be plenty. Worst case, for longest, fullest head of hair I can imagine, maybe a full pack of each. So again, $2o tops!
The henna needs to sit ~8 hrs after getting mixed with something acidic: orange or lemon juice. You can squeeze it yourself, or just pour some OJ in it, enough to make it a yogurt-like consistency. Cover it with a lid or plastic wrap & let it sit on your counter top overnight.
Add the indigo 15 minutes before your ready. I use equal amounts, which I would suggest for your 1st time. After you’ve boosted your confidence that the results are not going to be radical you can play around with it a bit by adding a little more or less henna/indigo ratio. Add enough water to make it into a smooth, spreadable paste. The indigo has a smell that resembles peas. I add in several drops of orange and/or lavender essential oils to help with the smell.
Wear gloves & start applying in sections. I had my Hubby help me the 1st time, but have done the other 2 times on my own. I do sections then kind of massage it in real good, especially focusing on the areas where the grays frequent. Cover with plastic wrap (I had to buy some just for this as I don’t normally keep it around). Wipe off any excess from your ears, forehead, neck.
Let sit at least 2.5 hours. The 1st time this was all I did, as again, you’re worried it’s going to be some drastic outcome. Each time I’ve let it sit longer. I’ve read of people letting it sit over night even! The last time I let it sit 6 hrs & I just LOVE how it turned out! For my already brown base color the henna/indigo mix results in a chocolately/copperish with red highlights. You’ll see some photos below.
And that’s it. Wash, wash, wash. And then wash again until your water is absolutely clear. It takes up to 3 days for it to settle on its final color, it does continue to darken over that time, pretty cool, huh?!
**IMPORTANT ADVICE TO NOTE, this comment was sent to me: As a hairstylist, we recommend no hair dye for at least 3 months before using henna and vice versa.
________________________________________________________________
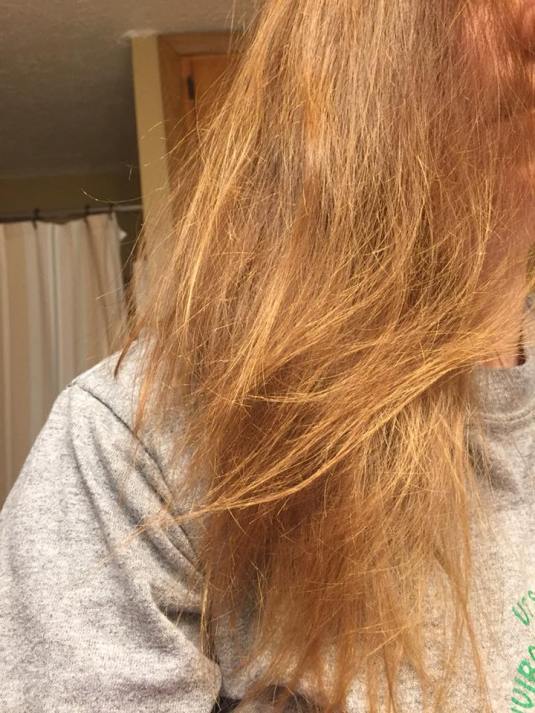
Below are my photos: My natural hair, never dyed (well, a few purple, pink toxic dye jobs in high school). As more & more grays come in (I’m 36) the brown becomes duller. Not the best lighting, but I was ready for some gray coverage.
After 24 hrs, a nice coppery, chestnutty red/brown, with grays covered!
Results after the 3 day wait, out in the natural light, I LOVE it!
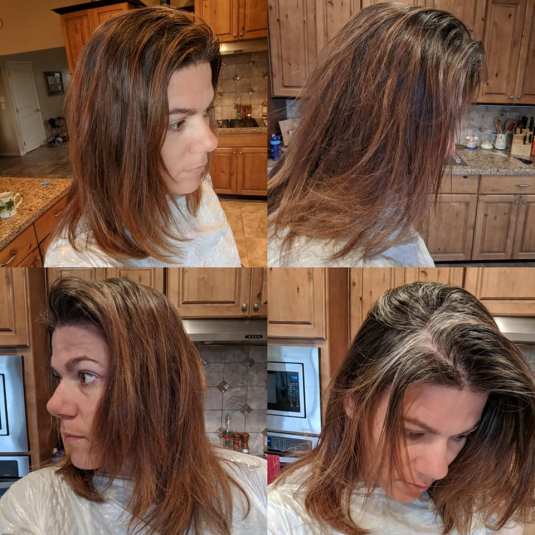
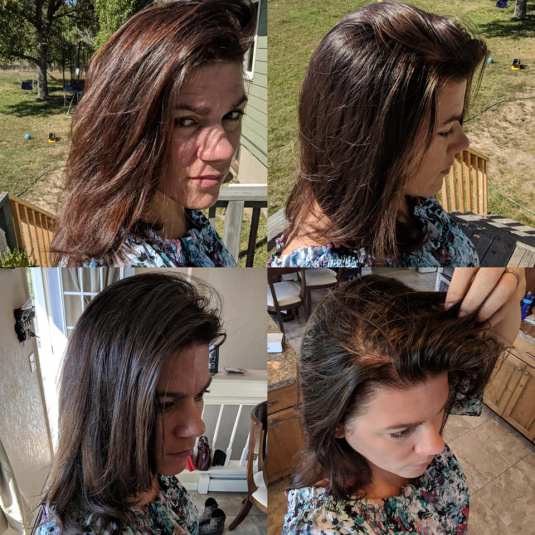
More recent pics of mine (2017):
More indigo than henna below:
So many great highlights, it’s very rich & complex ♥
More indigo than henna below (11/2016):

____________________________________________________________________
From Kristin: 10/18/17: Here are my first-time henna/indigo dye results! My medium brown hair was very dull and brassy, especially the ends. I used 1/2 henna and 1/2 indigo and pretty much followed Jessica Brandt’s instructions exactly, except I only left it in my hair for about 1.5 hours, this was my first time using it, so I wanted to see how my hair reacted and didn’t want anything too drastic. It was actually not as messy as I was expecting, the mix was pretty thick which minimized the mess, but I might thin it out just a bit more next time so it applies easier. Next time I’ll try leaving it in for 3-4 hours to get a bit darker. Overall soooo happy with the results, my hair is much richer in color and it’s the exact subtle boost I was hoping for this time around. With tax and shipping this came out to about $25 and I should get 3 uses out of it! I’m so grateful there is a safe affordable dye out there!
Kristin before:
Kristin after: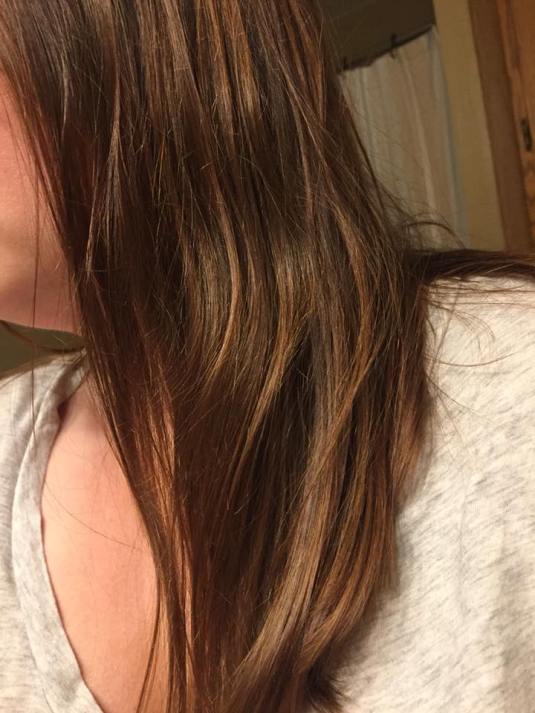
_________________________________________________________________________
Susie’s 1st henna/indigo job!
After 3 days, here’s the final result. I think you’ll agree it looks fabulous! She did get a haircut also!
____________________________________________________________________________________________From Jodi:
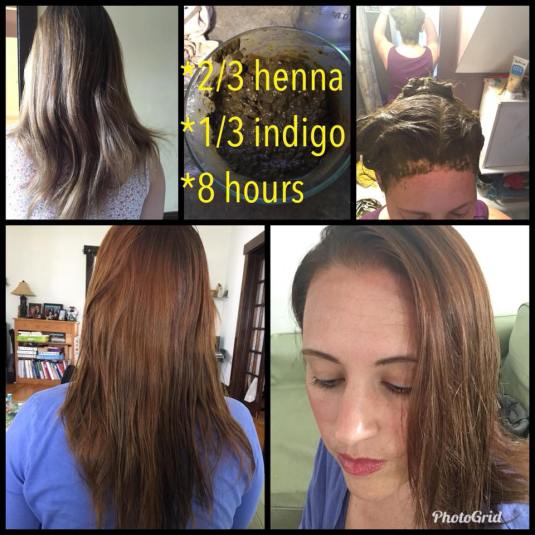
Time for hair change, again! I spent TONS of time online analyzing others’ results and pictures when I first decided to venture into henna & indigo, so I want to put my pictures out there again for other people to see in hopes of helping someone! Same process as last time, except that this time I used 2/3 indigo & 1/3 henna, for a total of 100g. This was more than enough for my hair (last time, I used 66g total but my hair was a little shorter.) She let it sit ~6.5 hrs.
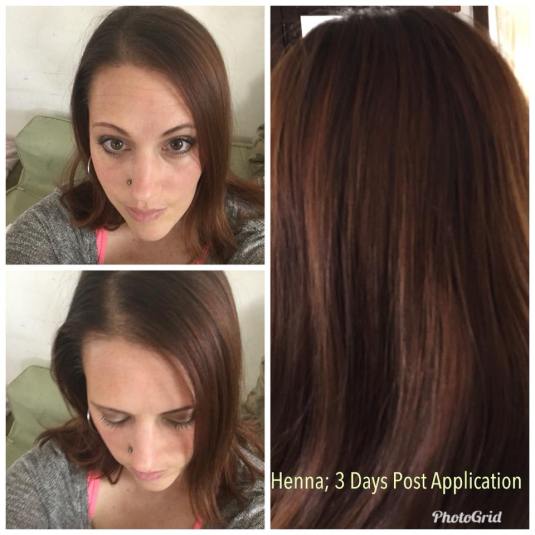
24 hrs later!
____________________________________________________________________________________________
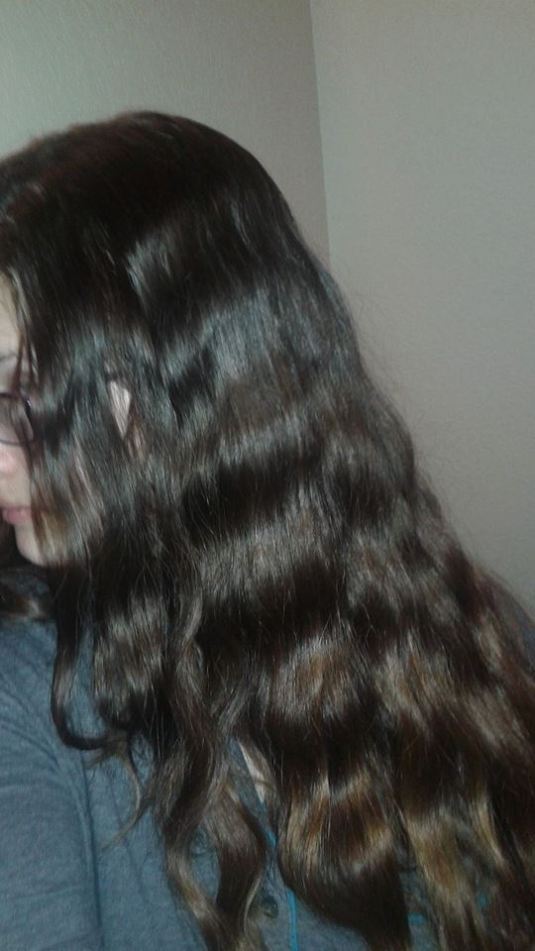
From Nikki:
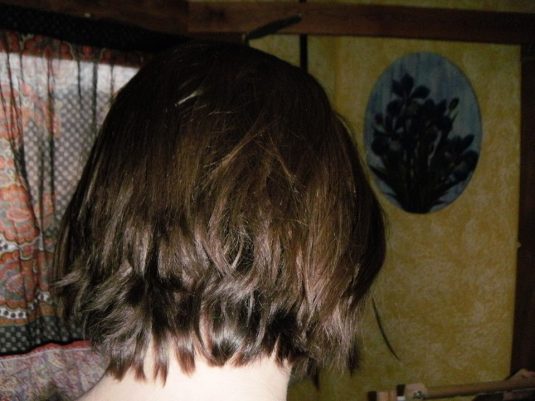
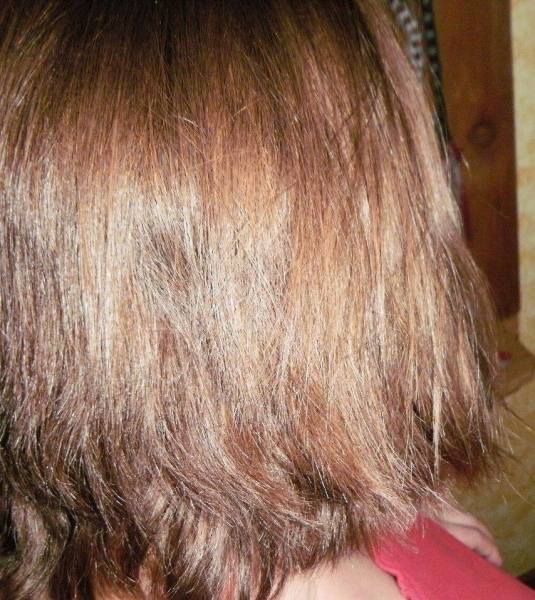
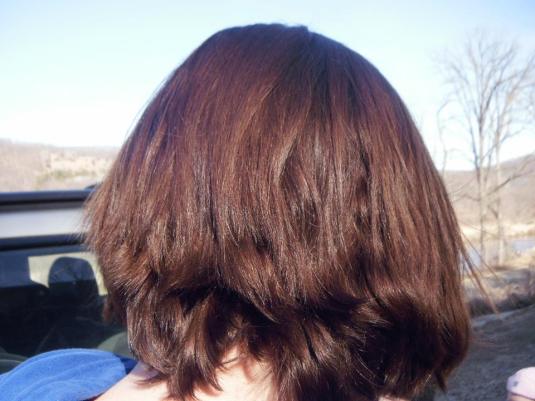
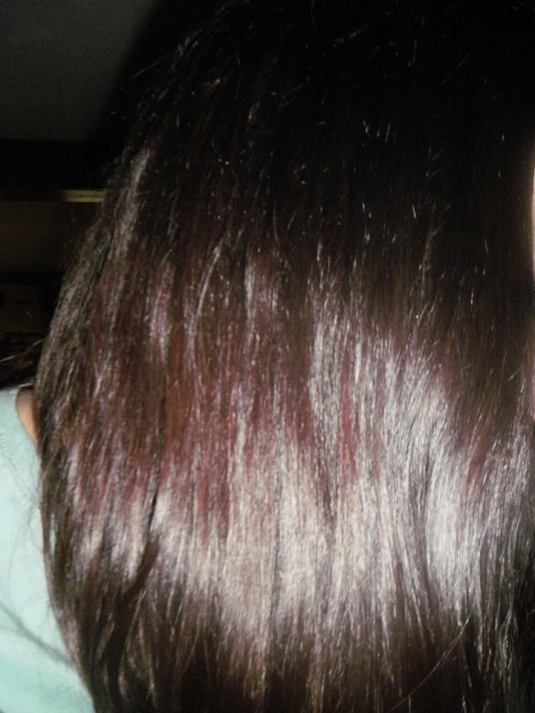
Showing the difference with henna and indigo… just a slight change and definitely nothing to be afraid of… first is just henna, second is 1:1 ratio and third is 2:1 indigo:henna ratio. Natural color before henna was light brown with dirty blond highlights (pic on the left)


________________________________________________________________________________
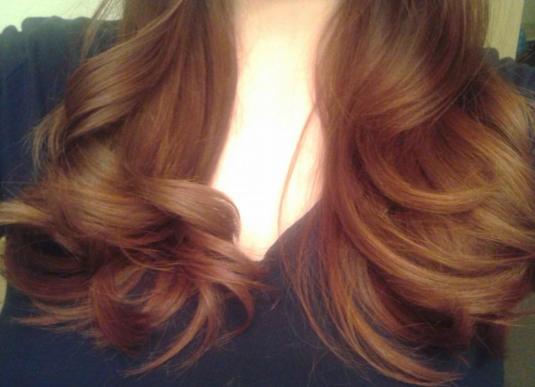
Jolene, my co-admin’s results using Poofy’s henna & indigo:
Below are her results with just henna:
__________________________________________________________________
From Anne: I just have to share my henna/indigo discovery. I have always followed Jess’s directions to a T but it’s always too red/orange for me, even with 2/3 indigo and 1/3 henna. I wasn’t going to quit, but I am always wishing I could get my beautiful dark brown hair back. I did some googling last night and realized you MUST mix the indigo separately and let it sit for 20 minutes. I’d always been dumping it into the henna mixture after it sat overnight, 15 mins before coloring. You won’t develop the indigo that way and therefore, your hair will be too reddish. I also read, no lemon or yogurt should be used. I just used warm water and added a teaspoon of apple cider vinegar. I also just rinsed it, will not wash for 2 days. I couldn’t be more in love with my beautiful brunette hair that I’ve been longing for. Mind you, I also cover hair that is completely gray. My roots are nice and dark and not red!! It should darken up more in the next few days too. Just thought I’d share as it’s been a topic of discussion on here quite often. I meant to do 4 hrs but I couldn’t put my book down so it ended up being 5. I did 3 tbsp henna and 6 indigo and it was the perfect amount. The key is letting the indigo develop its color, just like the henna. I hadn’t been doing that!
(note from Jess, I think this is definitely worth trying if you have more grays to begin with. Mixing them together works fine for me. I LOVE that Anne didn’t give up, did some more research, and found a perfect combo and process to get the desired color she was going for!)
CASSIA:
Many thanks to Lisa for these pics, and the following info:
Crown before and after
Side before and after


I love it! For me it’s more like my original color before I all the white! Instructions, sent in from Lisa as well. Credit to ktani at the longhaircommunityforum.com and on her blog, ktanihairsense.blogspot.com. This information is condensed from sifting through pages and pages of mostly her experience and research.
Cassia hair treatment for golden color temporary dye and strengthening. Cassia is not a permanent dye like henna and will not stain skin (it may stain towels). Cassia golden tone lasts 3-4 weeks. Repeated use may set the color more. Works best on blind and light brown hair. May work for white hair. May add golden sheen to dark hair. For long hair use these amounts. Can freeze leftovers for future use.
Heat about 350mL distilled water to warm temp
Remove from heat
Add the warm water to 100 grams cassia obovata (pure) and mix to remove most lumps. Use enough water to achieve a runny thick pancake batter consistency like mud.
(can also adjust portions of each proportionately also depending on how much you need). (Can freeze leftover)
Let sit covered for 2-4 hours for dye release or overnight
(Your hair should be free of product residue/product oils/conditioner product as best you can first.) Get your hair damp.
Put it in squeeze bottle like from Sally’s.
Squirt and use hands as needed to apply on DAMP sectioned hair. Or skip the squirt bottle and just use hands. This will be very messy but the best method is to section and clip hair first then unclip one, apply goopy mud, and reclip. Repeat until finished. Soaking each section of hair with the mud. Apply around edges and scalp. Get it all goopy and soaked in mud. It’s like green wet mud and smells like hay. It won’t stain skin unless it’s not pure (Poofy’s is pure). Make sure it’s applied all over and squished around. While you’re doing this you will be wondering if your hair will be green!
Apply cap and keep on for 2-4 hours or overnight. It will ooze out so if overnight put a towel over your pillow.
Best way to remove is a mermaid soak! (Fill bathtub with water and get in the tub…lay head back with hair under water and work it all out. Drain and repeat if necessary.)
Hair will probably feel soft once it’s all out. It will be gritty before that. Can shampoo and condition and recondition if it feels dry and can do oil treatment if needed. Cassia opens or fluffs the cuticle which may make it seem like your hair is dry but this is temporary. Your hair will feel thicker. With cassia, you may need to moisturize your hair afterward otherwise your hair may feel a little hard at first until you get enough moisture back in it. It is strengthening, but not necessarily moisturizing. Once you get it moisturized again, it’s better than it was to start out with. But don’t be alarmed if you’re rinsing and thinking “Hmm a little rough…”
Effect: May golden yellow dye light hair and may give a golden sheen to darker hair or just strengthening. Lasts up to 4 weeks. Not permanent color like henna but effect builds. It may take a couple repeated treatments and then about 1x/month maintenance. It will strengthen hair.
“Cassia obovata will make damaged hair silky, thick, lustrous, and helps keep your scalp healthy, just as henna does. This has a golden yellow dye molecule.”
Do not mix with an acid (orange juice, tomato juice) regardless of what other websites say. Acids can be drying to your hair. Don’t get fancy and try to mix it with yogurt or tea or anything else. You want your hair to be able to access the cassia without interference. Try the basic recipe first.
Recommend strand test first. And skin test first for any reaction.
Here is my affiliate link to Poofy’s henna: https://ecofriendlyusa.poofyorganics.com/products/1390-rajasthani-indian-henna-powder-organic.aspx
And the indigo: https://ecofriendlyusa.poofyorganics.com/products/1232-indigo-for-hair-powder-organic.aspx
I hope you’ll give it a try & share your experience with me!
Discover more from Eco-Friendly Mama: Safe product recommendations with a focus on organic and Made in USA!
Subscribe to get the latest posts sent to your email.
